2004
Triumph Sprint ST Tank Removal
by Wilson Steele
So the other day, I decided that I might want to
know the air intake temp of my bike. I’m not really sure if that
makes sense to the rest of you, but that’s the type of guy I am.
I am thinking of installing some header wrap some time soon, and I’ll
let you know what the effects are at that point.
I am also looking for a way to replace my temp gauge
with one with real numbers, a 270deg swing, and a switch to go from H2O
to Oil sensing. But on with this project.
- Cheap $10 In/Out temp sensor from PepBoys Auto.
 2004 Triumph Sprint ST
Man she’s pretty. Let’s take all kinds of stuff apart just to
look at it. Or find out what the air intake temp is during normal
riding.
- So, off comes the seat
- Rear grab bar if you have it.
- 4 really pesky bolts, two nuts are welded in place, two will need
acrobatic fingers to hold underneath plastic flange.
- Rear plastic skirt (name?).
- This is actually three pieces bolted to together that I did not
separate. They flex just the right amount if you are gentle and
ask politely.
- There are four bolts, and four push tabs to the skirt. The
bolts are center and rear, the push tabs are on each side of the tank,
and right above the passenger foot rest.
Tank removal
It’s actually not all that hard, there’s one bolt we all stare at below
the steering tube.
- There are two bolts (Torx, I seem to recall) now plainly visible
are rear end of tank.
- Nice installation to NVH guys at Hinkley.
- Find a block of wood to prop the tank on that will raise it about
7cm and hold it there for you while you disconnect all the lines from
the tank
Tank Lines
 There
are 6 things to take off the tank: 2 breather tubes, 2 fuel lines, and
2 electrical connections.
There
are 6 things to take off the tank: 2 breather tubes, 2 fuel lines, and
2 electrical connections.
- The two fuel lines will be colored red and silver (If you own my
bike, that is. So maybe not . . . )
- I was told by my local shop that the tank has the fuel pressure
regulator inside, so it doesn’t matter if you put the lines back on
wrong. But remember which one is forward just because you should.
- They have a very neat and simple disconnect mechanism that
baffled me for a second. Don’t pry on it, just press and it will
unlock. Slick ...
- The two breather lines are just held on by brass nipples.
- Remove, and don’t play with the nipples (too long).
- One electrical connection is the in-tank fuel pump (I guess).
- One electrical line underneath the tank, probably that useless
fuel sender.
Hey, that tank is light! Wait a minute, it’s fiberglass!!! Way
cool. No wonder those magnetic tank bags won’t stay on. Actually,
it’s plastic, I can’t tell whether it’s fiber reinforced or not.
But way-cool none the less.
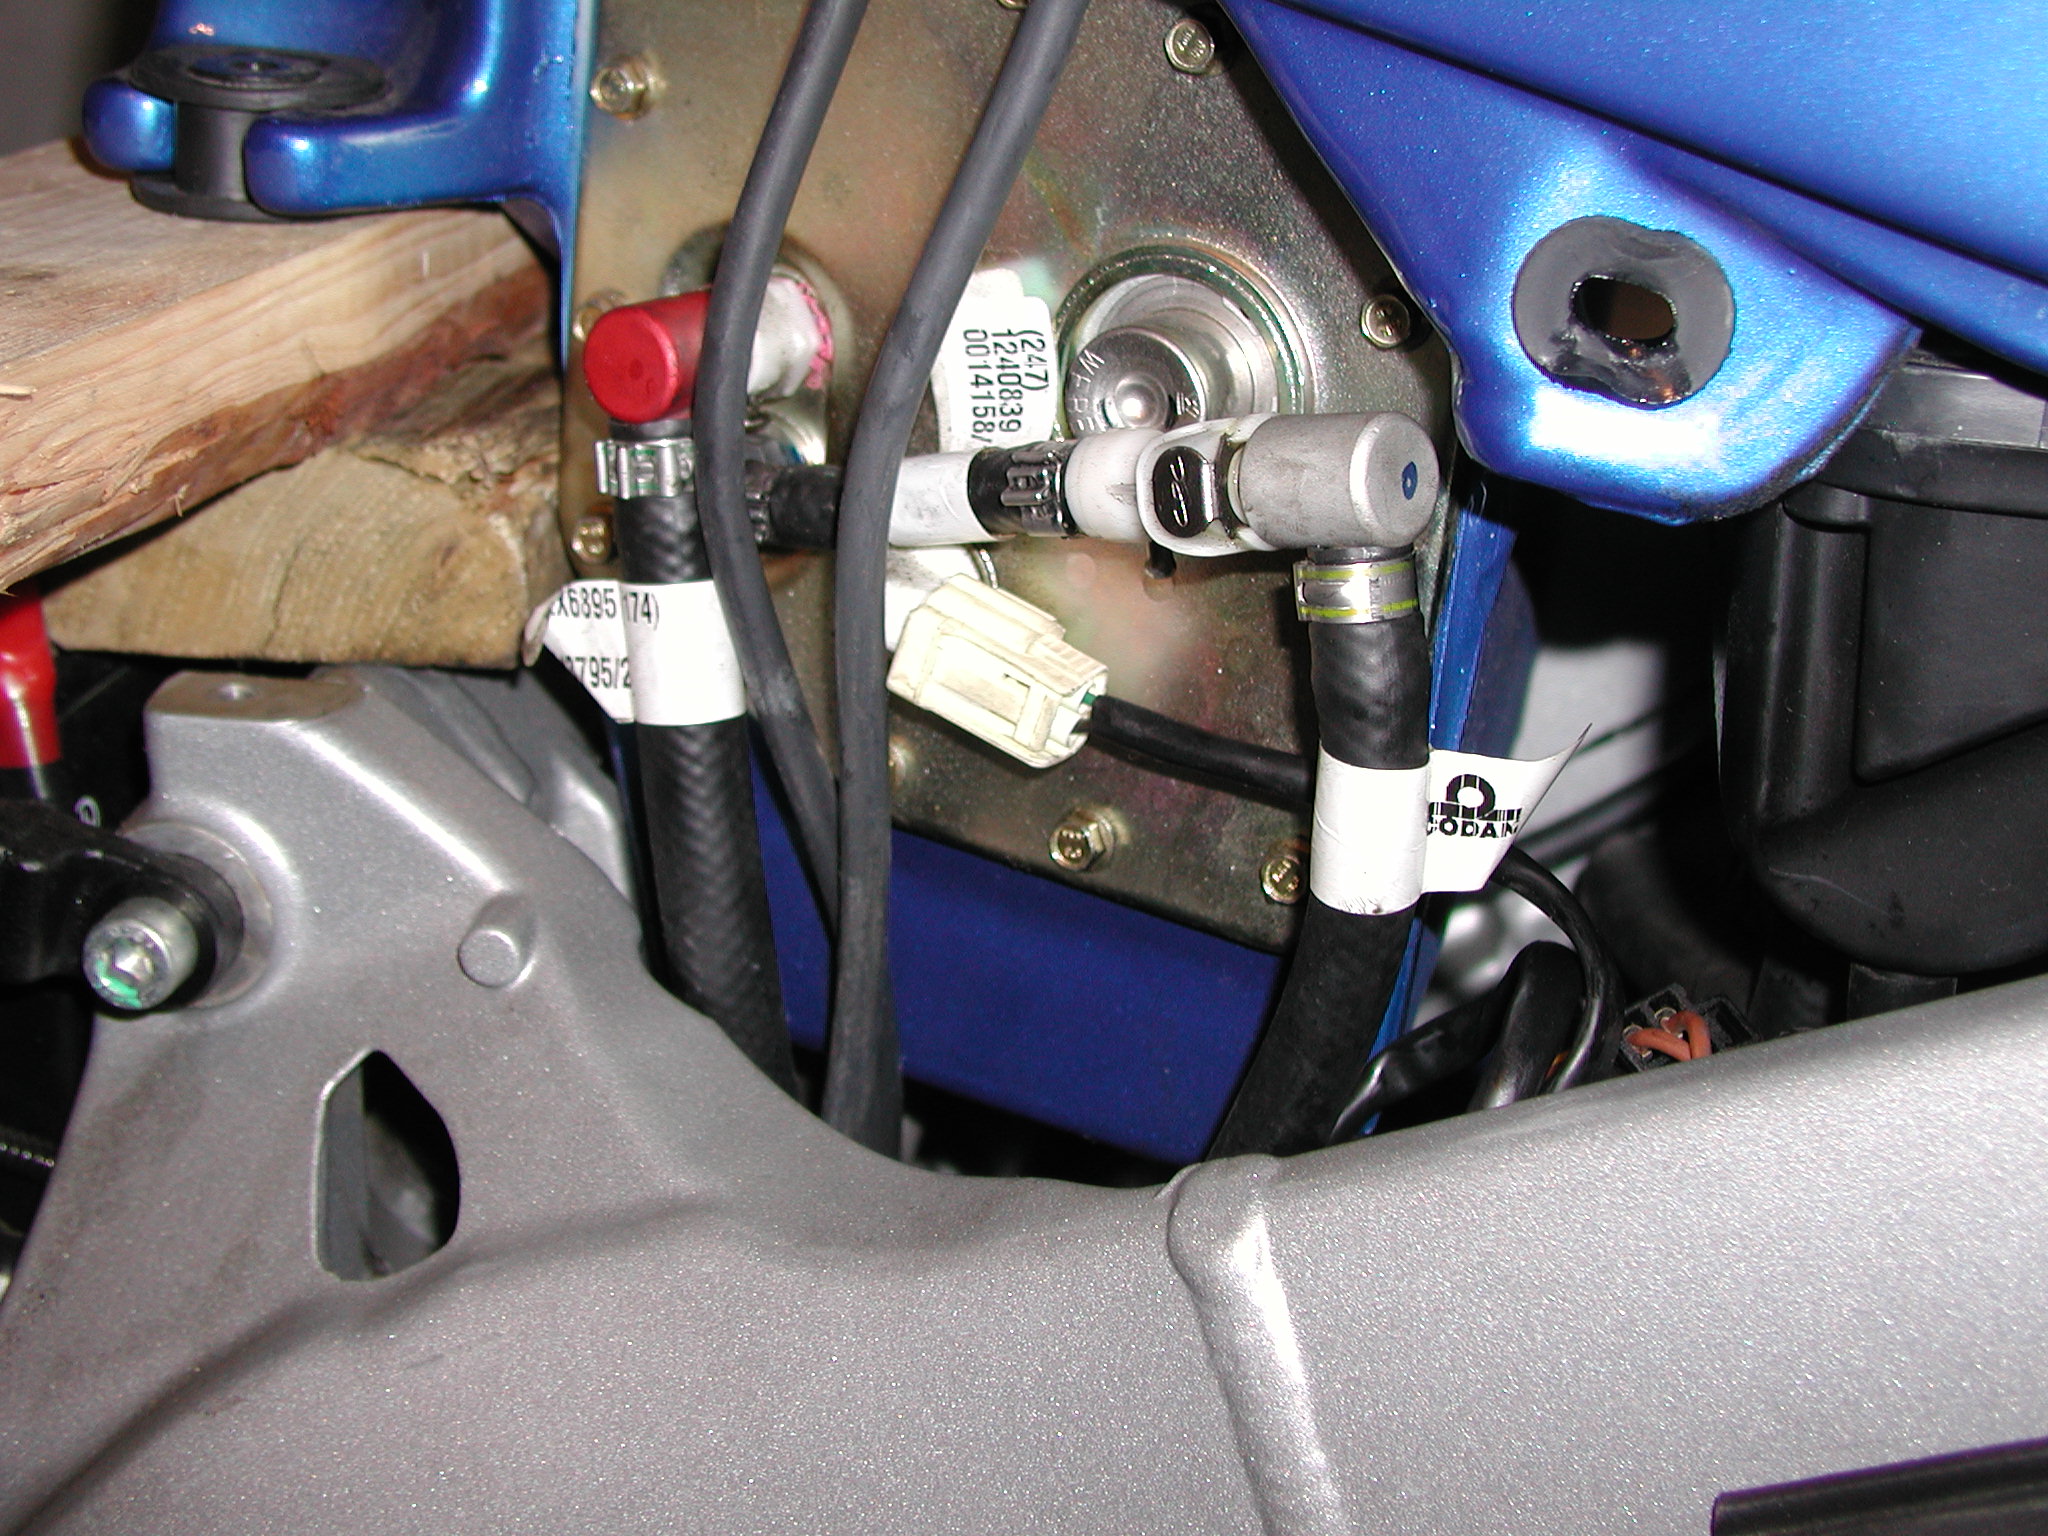
Lines Off
 So when all the lines are off, it should look something like at
right. I went ahead and put a few zip-ties around the frame to
hold everything out of the way for me.
So when all the lines are off, it should look something like at
right. I went ahead and put a few zip-ties around the frame to
hold everything out of the way for me.
There will be some residual fuel spillage when
things are disconnected, but not that much.
The tank doesn’t seem to leak at all when lines are
un-plugged, so kudos to triumph engineers for not making me drain the
tank to play with taking the tank off. Not like the old Honda in
the corner.
- Throw tank gently in corner.
- Make sure you lift straight up, you might be surprised how tall
the airbox is.
Tank Off
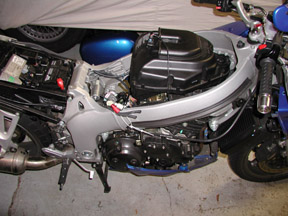 So,
now you’ve got this far, and you have the air box looking at yourself:
So,
now you’ve got this far, and you have the air box looking at yourself:
- There is one line to take off the top of the box, and guess what,
it is of course the air intake temp sender.
- Being a stupendously wise person (who is taking apart a working,
almost new bike), I decided not to play at all with stock components
that are vital to engine computer function. Some EE out there
should be able to figure out how to make this display to the dash, but
I haven’t yet.
- Unplug connector.
- Torx Bolts around perimeter of box come out.
- Torx Bolt at center of box lifts the box up.
- Very nice touch.
- Off comes airbox top.
Airbox Top Off
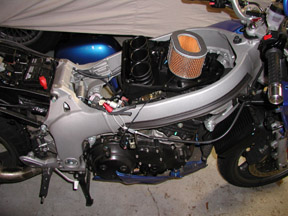 Okay,
so here we are. I decided to put my temp sensor right in the
paper element of my filter, away from the engine side of things.
Even though it’s a small thermo couple, I still don’t want a chance of
metal bits in the engine.
Okay,
so here we are. I decided to put my temp sensor right in the
paper element of my filter, away from the engine side of things.
Even though it’s a small thermo couple, I still don’t want a chance of
metal bits in the engine.
- There is an air box vent / drain on the rear left hand side of
the box, with a 5mm hose running down the side of the back of the
cylinder bank.
- I ran my temp sensor wire up this tube.
- The wire then runs under the bottom of the cleaner element, and
sticks right in the center and back of the mesh.
- I drilled a smallish hole in one of the support ribs and put a
zip tie in place to make sure that wire wouldn’t be moving around.
For Reassembly, Hold Computer
Screen to Mirror.
Put it all back together, and go for a ride. Hope the pictures
help. Info on header wrap as soon as I get around to it, which
could be quite some time.
Cheers, and keep the rubber down,
WFS
 So when all the lines are off, it should look something like at
right. I went ahead and put a few zip-ties around the frame to
hold everything out of the way for me.
So when all the lines are off, it should look something like at
right. I went ahead and put a few zip-ties around the frame to
hold everything out of the way for me. So,
now you’ve got this far, and you have the air box looking at yourself:
So,
now you’ve got this far, and you have the air box looking at yourself: Okay,
so here we are. I decided to put my temp sensor right in the
paper element of my filter, away from the engine side of things.
Even though it’s a small thermo couple, I still don’t want a chance of
metal bits in the engine.
Okay,
so here we are. I decided to put my temp sensor right in the
paper element of my filter, away from the engine side of things.
Even though it’s a small thermo couple, I still don’t want a chance of
metal bits in the engine.